Since React introduced the lazy function, lazy loading components have become easier than ever.
In this tutorial, you'll learn how you can use it to improve the performance of your React applications.
What is code splitting?
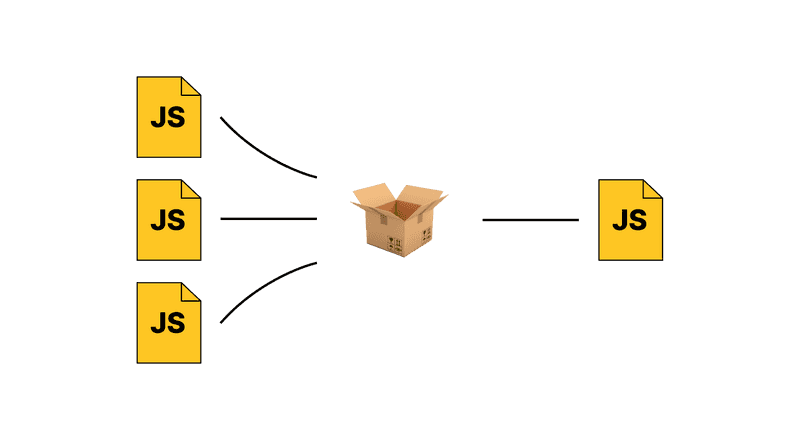
When working with React, you typically use a bundler like Webpack or Parcel to create the JavaScript, HTML, and CSS for the browser.
As the name suggests, they bundle all your JavaScript files into one single file.

Parcel bundles and minifies your files into one.
These bundlers don't only bundle your React code but also all the code you require from external libraries.
As more features are added to an application, this can quickly add up to one large file.
A few KB more may not sound as much, but you need to keep in mind that not everyone has access to a high-speed internet connection at any time.
Think about mobile 3G networks or other parts of the world (like rural Germany 🤦) where fast internet is unavailable.
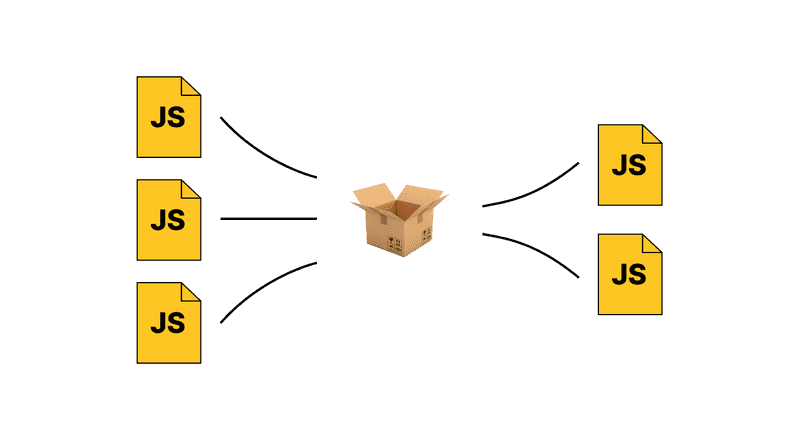
Code splitting reverses some of this process and creates multiple files instead of just one.

Of the outputted files, one is the entry point which the browser will always load.
The others are loaded on-demand, meaning that they will be loaded when the given component renders.
Example
Here's an example of how this looks in action: click on the button to render a component that will then be lazy-loaded.
To get the most out of it, do the following before clicking the button (if you already clicked, reload the page).
- Open the Network tab in your DevTools, filter by JS, and clear the entries.
- Throttle the network connection.
- Click on the button and observe how a new file is loaded.
Click this button 👇
Spoiler: This is what you should see in the network tab after clicking the button:

The lazy component is loaded on demand as a separate file.
The compiled project consists of two JS files: one main file and one for the lazy-loaded component.
In the next section, we'll see how to implement this.
How to use React.lazy
You can use React.lazy without any additional configuration. Here's what you need to do:
Step 1: Change the import to React.lazy
Take any component that you want to lazy load and change it to the following:
- import MyComponent from './MyComponent';
+ const MyComponent = React.lazy(() => import('./MyComponent'));
You can do the same for library components as well.
You can't use named exports with React.lazy. So something like the following won't work:
// THAT DOESN'T WORK
const { MyComponent } = React.lazy(() => import('./MyComponent'));
You can either change the export in the component itself or do a re-export like this in the index.js file:
export { default as MyComponent } from "./MyComponent";Step 2: Wrap the component in React Suspense
Any lazy-loaded component needs to be wrapped in React's Suspense component.
This wrapper renders a specified fallback component that will be shown while the component is loading:
const MyComponent = React.lazy(() => import('./MyComponent'));

const App = () => {
  return (
    <Suspense fallback={<span>Loading...</span>}>
      <MyComponent />
    </Suspense>
  );
};
You can pass any component you like as a fallback. Just make sure that it isn't lazy-loaded as well, of course 😄
And that is how you lazy load components in React. Pretty easy, right?
Important: You may need to remove the
splitChunkssection from your current webpack configuration when working with React.lazy.
React lazy and TypeScript
React lazy works out of the box with TypeScript. There's nothing you need to do differently here.
Make sure that
moduleis set toesnext.+ tsconfig.json"compilerOptions": { "module": "ESNext" //... }
Code splitting routes with React lazy
When optimizing the bundle size of your application, one of the easiest ways to do this is to lazy load an entire page of your application.
You could start with the settings or another rarely used page.
Code splitting routes works the same way as any other component.
However, we don't need to wrap each and every route in Suspense in this case. It's enough if we wrap the whole Routes.
<Suspense fallback="Loading...">  <Routes>
    <Route index element={<LazyComponent />} />
  </Routes>
</Suspense>
Error handling
It can happen that the file we want to lazy load doesn't load correctly for some reason.
To prevent the entire screen from turning white, we can handle the error by creating an ErrorBoundary component.
class ErrorBoundary extends React.Component {
  constructor(props) {
    super(props);
    this.state = { hasError: false };
  }

  static getDerivedStateFromError(error) {
    // Update state so the next render will show the fallback UI.
    return { hasError: true };
  }

  render() {
    if (this.state.hasError) {
      return <h1>Something went wrong.</h1>;
    }

    return this.props.children;
  }
}
You can check out the React docs to see how this works in detail.
We wrap this around our lazy-loaded component:
<ErrorBoundary>  <Suspense fallback="Loading...">
    <Routes>
      <Route index element={<LazyComponent />} />
    </Routes>
  </Suspense>
</ErrorBoundary>
Conclusion
As you can see, code splitting React code has become more accessible and doesn't require any additional webpack configuration as it used to.
Did you find this article helpful? You can subscribe to my email list in the footer to get updates on content about React and JavaScript 👇