Over the last year and a half, I've been reading a lot about micro-SaaS, indie hacking, and building a profitable side project online.
It all inspired me to start something on the side as well, so in the last four months, I started working on a side project in my free time.
Initially, the project's scope was pretty small, but as time went on, I discovered more and more features I'd need to include to make it usable.
In this article, I want to share my journey, learnings, tools, and obstacles I faced while building out the project.
Finding an idea to work on
Coming up with a good idea was and is hard. I've never done something like this, and I wanted to make sure that it would be worth my time.
For months I would keep a list of product ideas to validate, but none of them really convinced me.
Here are some of them:
- A music player for guitar practice
- A service that notifies you about NPM package updates
- Web push notifications as a service
- A cross-posting tool for blog platforms
- Embeddable feedback widgets as a service
It is common advice that you should first validate your idea before writing any code. But with some products, it's more straightforward than with others.
I could've certainly created a landing page for all of these ideas, promoted them, and seen what had the most traction—I knew the whole theory.
However, I'm not good at marketing. I've never done anything like that, so even if one of the ideas was good, the validation might fail due to other factors.
In the end, I decided to go with the idea I was most excited about and which solved a problem I had myself. Worst case, I'd spend a bunch of time on something no one but myself is using, learning a few things on the way.
The idea I'd be working on was a tool for embeddable polls and reactions.

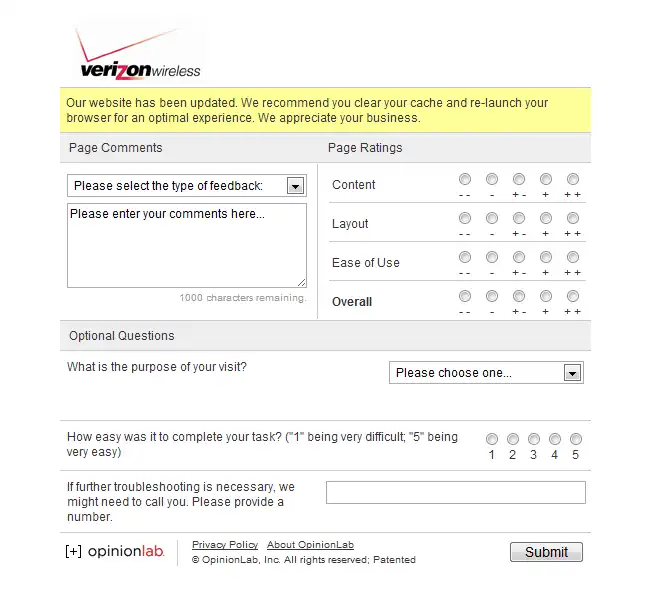
This is probably the ugliest survey tool out there.
But if they can make money with this, why can't I?
Forms from other competitors were either looking like they had been created 20 years ago, didn't support voting on multiple pages, or didn't allow to collect additional feedback.
To be honest, I could have probably found something that checked all these boxes, but I just wanted to work on something. So that's what I went with.
There’s competition for good opportunities. And because of that, if you can intelligently take on risk, you will find opportunities others miss. Reid Hoffmann
Building the MVP
After selecting an idea, it was now time to start building.
I wanted to focus on creating a tool that would allow me to embed polls on my blog (the one you're reading right now).

The final version of the embeddable widget for the MVP.
Getting started
I had started building a small product previously, so for this one, I decided to reuse some of the code.
Instead of copying the whole project, I created a small MERN-Boilerplate project so that it could be more easily used in the future.
It turned out, however, that a lot of features were missing.
Looking back, I could have saved a lot of time if I had invested in a boilerplate project or used one of the open-source solutions out there.
Design
As a frontend developer, I'm used to implementing designs, but I rarely get to think creatively about how I would design an application.
Creating my own application was quite challenging, and it got me to appreciate the work my colleagues do even more.
I just drew a few mock-up screens on paper for the initial designs.
For the landing page, I graduated to Figma, which I quite enjoyed using.
I also discovered websites like Dribbble or marketingexamples.com, which gave me inspiration for designs and copywriting.
Choosing a tech stack
For the tech stack, I chose what I already knew. I'm a frontend developer with a bit of experience in the backend with Node.js, so that is reflected in the technologies I chose for this project.
Let's have a look into the tech stack and some of the decisions around it.
Frontend

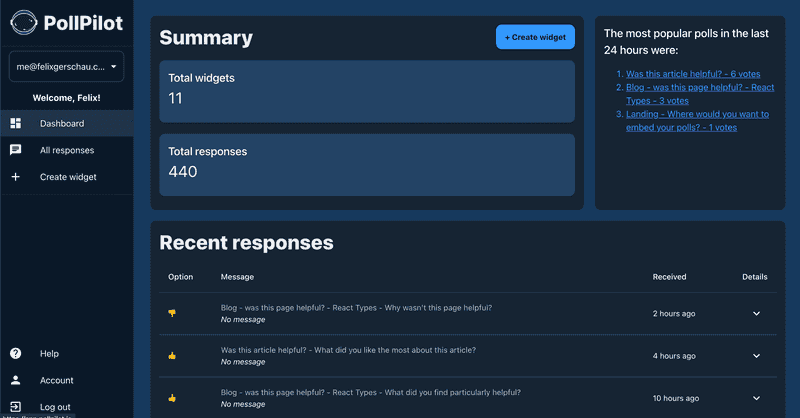
Screenshot of PollPilot's dashboard
Frontend tech stack:
- React.js
- Material UI
- Webpack
- TypeScript
- ESlint + Prettier - Code formatting
I kept the frontend tech stack fairly minimal to get started as fast as possible.
On both the backend and frontend, I use TypeScript as this allows me to rely more on my code, especially since I didn't write any unit tests.
It also makes me more productive as it catches stupid errors early on—like accessing a property that doesn't exist during development instead of in production.
State management
Note that I didn't include any state management solution. That is because React context, and React's useState are already powerful enough to power most applications.
So far, there's nothing I miss from Redux, MobX, and alike.
I wrote an article on how to use React context.
Material UI
Material UI is a component library. It saved me an incredible amount of time as it provided me with all the building blocks I needed to create something useful.
I customized the components with a custom theme and used styled components syntax to customize them even further.
The components include a bunch of features and animations that would take ages to replicate while building an application.
Webpack
Webpack is a module bundler that compiles my code into a few JS files that are compatible with most browsers.
It is highly flexible and enables code-splitting, among many other features.
Backend
- Node.js
- Express.js
- Webpack
- MongoDB
- Docker
- TypeScript
- ESlint + Prettier - Code formatting
The backend stack was also fairly standard, and it is what I believe most JavaScript programmers are familiar with.
Initially, I included Docker to run the whole application, but now I'm just using it to run services like MongoDB during development.
Authentication
When building the first version of the MVP, I used Passport on the backend to handle authentication.
While it comes with a lot of plugins (or strategies), it takes some time to implement them correctly and hook them up to the database.
When I wanted to add authentication with Google, I decided to switch to Auth0, a managed solution that is pretty much plug-and-play.
Adding Auth0, however, came with its own set of challenges, as I needed to synchronize the users to my database somehow.
In any case, I'll definitely use a managed solution like Auth0 or Supabase for my next application again.
Payments
Taking payments online nowadays is made easy through services like Stripe.
Integrating Stripe subscriptions with my application to only give access to paid users was a little more complicated, but it was fun learning how all of this works.
I'm thinking of creating a tutorial on that topic, so make sure to subscribe to my email newsletter, so you get notified.
Landing page
I later noticed that I needed a landing page, which I decided to create using GatsbyJS.
The reason was that Gatsby websites are generally fast, I wanted to customize it, and I wanted to have a blog on it as well.
Gatsby is a static site generator that turns React code into static HTML and CSS for production.
It also includes a bunch of interesting features, like pre-loading content when hovering over links.
Since it would allow me to keep using React, I naturally gravitated toward this solution.
Serverless hosting and infrastructure
Hosting was the next big point. I was considering multiple options, including setting up my own Kubernetes cluster 🤯
In the end, though, I went with the easiest setup possible.
This meant using Cloudflare Pages for the SPA frontend, Heroku for the backend, and MongoDB Atlas for the database.
All of these platforms have the advantage that they don't require me to manage servers or any other parts of the underlying infrastructure.
The setup was incredibly easy, and with just a few clicks, everything was ready.
The great thing about all these tools is that you can start using them for free. If you want to get more serious, I recommend upgrading Heroku for $25/month.
Getting users
Now, this is actually the hard part. Creating software is something that all developers are comfortable with.
This is also the point that separates a side project from a business—and I'm not sure whether this has the potential to become a business.
I was lucky to get one early user, who was Tiago from The Stack Junction. He tried out the application and provided me with good feedback.
Other than that, I got a few users from posting to BetaList.com and Blogging for Devs, but only a few of them stuck around and tried out the application.
You can see that I can count my active users on the fingers of one hand.
I initially created the application with bloggers in mind, so my goal is to talk to some of them and see what their needs are.
What would I do differently next time?
For my next project, I want to do it the other way around and start exploring the market and validating before writing any code.
Although doing these things is outside my comfort zone, this is most likely the best approach to create a product that people would like to use.
When it gets to coding a web application, I will try to focus more on using no-code or low-code solutions to avoid spending too much time on coding.
What's next?
There are a lot of features and tweaks that I still have in mind. From the early feedback I received, I can see that there are a few things missing to make the product valuable.
The vision for the product is to enable content creators to collect feedback and engage with their audience.
For now, I'll take a break from adding more features, so I can improve the core functionality while at the same time putting more emphasis on user feedback.
Conclusion
I hope you enjoyed this breakdown of my side project. Are you working on any side projects as well? Feel free to share your own experience in the comment section below!